Sea to Summit Escapist Tarp

An excellent tarp that delivers on exactly what it promises. It's lightweight, simple to use, allows a variety of different setups, works well with the separate Escapist Bug Tent, and unlike other silnylon tarp products (read you, Integral Designs) it comes ready to go out of the bag. Half a star off for making the discovery of dark matter easier than trying to repack the damned tarp.
Pros
- Easy to use with a small amount of practice
- Practical
- Lightweight — 350grams (that converts to 'not many oz' for the imperials out there
- Comes with attached tieouts
- Allows easy attachment of the Escapist Bug Tent
- Good to go straight out of the bag
Cons
- Not bug proof (hence my having the separate bug tent)
- You have to practice pitching
- Probably no good in hurricanes, tornados, etc (read on—you'll get it)
- You will solve the mystery of dark matter before you learn to repack the tarp
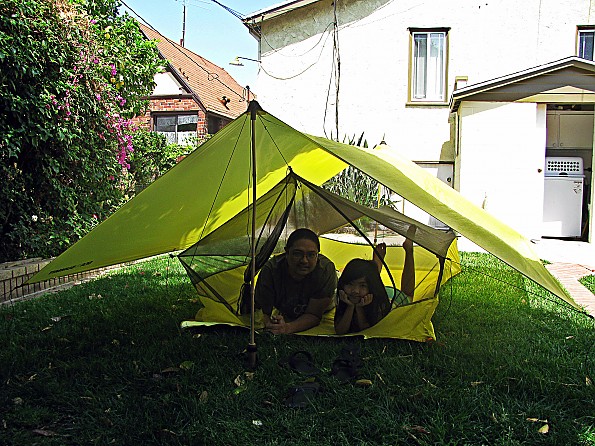
This is a 3x3m tarp that I bought to accompany the Escapist Bug Tent (reviewed separately).
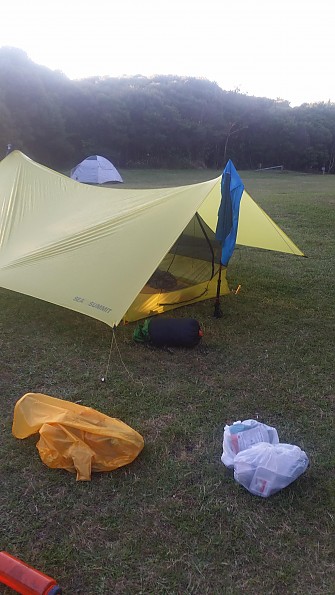
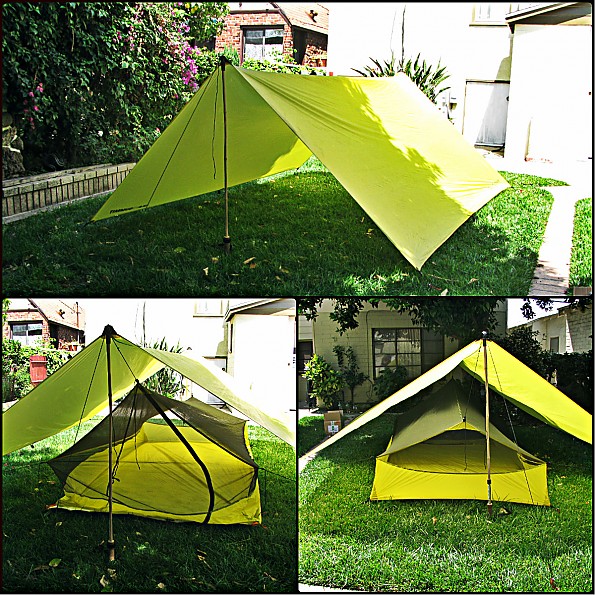
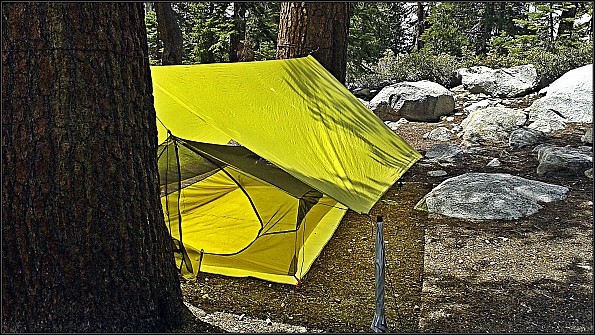
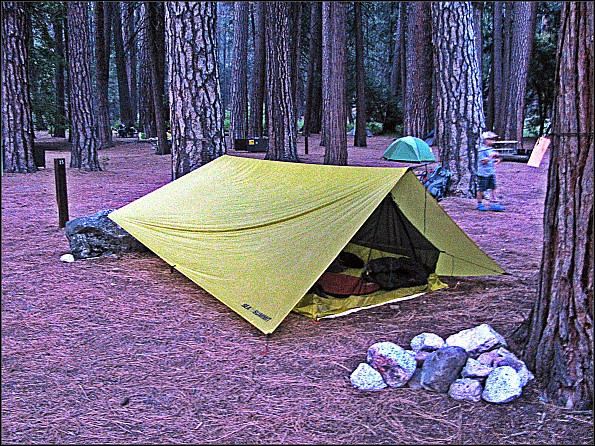
Setup: A previous reviewer has noted it takes a bit of practice to set up. This is particularly so if you are also joining it with the Escapist Bug Tent. I spent about an hour getting used to pitching it. You can see in the photo I got it largely right (it was taken on the Hillary Track with me the weekend just gone). Just after the photo I reset the middle and got the pitch even tauter (couldn't photo as I was running out of battery).
Stability: The windiest day I had with it was the day I learnt to set it up. It stood firm albeit with some flapping in the middle of the tarp. This was more due to the finicky requirement of getting the pitch 'just right' than any inherent flaw in the tarp design. So well satisfied. On the track it stood firm and didn't budge.
Weather Resistance: I've used a similar silnylon tarp in poor weather and it stood up fine to rain. Didn't have any rain over the three days I used it so couldn't really test. That said all silnylon has a tendency to hold the water. If you're packing out early before the sun comes out you'll likely take a bit of water weight with you due to the dew.
My final morning on the Hillary I had a particularly heavy dew (it was deathly hot the day before and I was in a green sheltered valley). No amount of shaking got rid of all the moisture. That said (today) it's taken 5 minutes to dry it out. So if you're moving after the sun rises it should be dry and back to normal weight pretty quickly (so long as you take it down last - eh). If it's raining—well—different story.
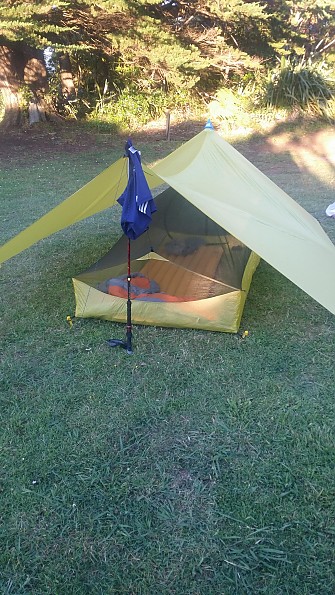
Ventilation: The tarp when in a-frame mode is well ventilated as one would expect. It was pitched at 130cm using my trekking poles and that had it well above the bug tent. Whilst there is no condensation from breathing (a normal problem in a tent) it still gathers dew both in the evening and early in the mornings. So if you accidentally touch it you will be 'rained' upon. This actually caused my down sleeping bag to start to take on some dampness. The solution is to be damn careful getting out of the tarp.
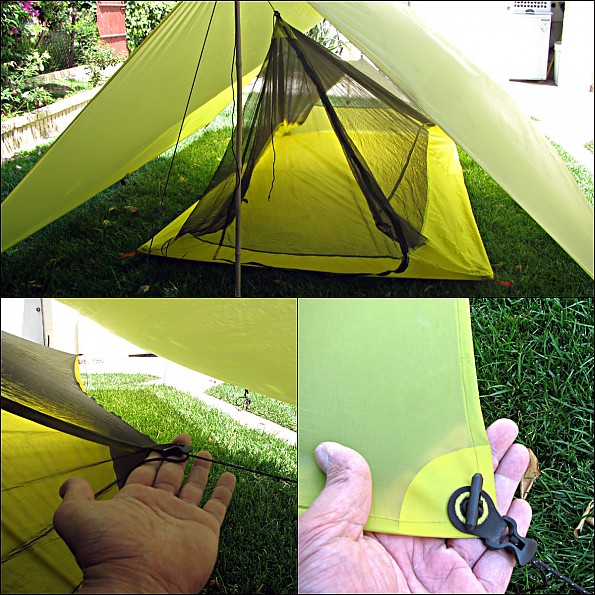
Room & Storage: At 3x3m it is extremely roomy. That's until you put up the bug tent. There is enough room between the tarp and the bug tent to put the back pack out of the way (put on the side facing away from potential rain). But the bug net is a limiter of space, particularly because of the tension lines that hold it up on the tarp semi block the front and back of the tarp.
Apart from that you get a large area underneath and if you have a means of erecting bug protection around your face then the bug tent is probably surplus to needs. You can see the gap between the bug tent and side of the tarp in the photo below.
Height wise you are limited by the length of your trekking pole or, if using trees, how tall you are. It can be as high or low as you want—and that's the great versatility (and beauty) of tarp camping.
Packability: Yes it's tough to pack. So I resort to stuffing. Have no idea whether that's any good for the fabric or not. And if it was hosing down and I just wanted to get going—I wouldn't care.
It is a nightmare to pack if you have to fold and roll. I originally did that, and became borderline certifiable on my 15th attempt to fold, re-roll, and place in the extremely small bag the tarp comes with. It is a guaranteed rage inducer.
Ease of Use: Once you've got the basic A-frame sorted it is extremely easy to use. It's up in around 5 minutes for me—and that's because I'm not racing to get it up. In wind all you do is stake out one side to the ground through the stake holes (sans guylines), then stake out the opposite side using the attached guylines, then erect and stake out the end poles—and proceed to restake the first side this time using the guylines.
From there it's just adjust guylines and poles until it stands up to the wind. I worked out that 130cm is the optimal pole height (if you intend to attach the escapist bug tent) so knowing your pre-set height makes it very easy to get it working quickly. I did this myself when first learning to use and it was pretty straightforward. Without the bug tent the height is up to you.
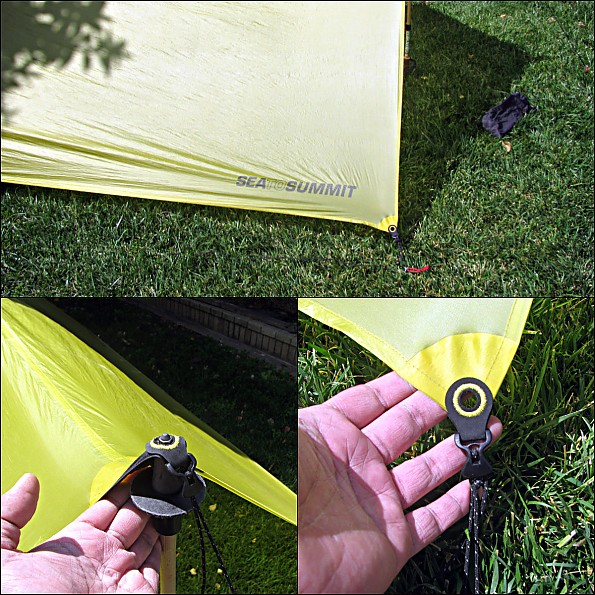
Features: What I really like is the attached adjustable guylines and loop holes for the bug tent. It is a simple yet ingenious little feature that makes this such an easy to use tarp. The only thing the tarp doesn't have is a centre line tie out, but having used tarps with this feature it's not a big deal it doesn't have one.
I also like the fact it comes seam sealed. I also have an Integral Designs Siltarp2 that I had to seam seal myself. What a stupid requirement from Integral Designs. Sea to Summit trumps them big time in this respect.
And the last best feature? Light weight. At just on 350 grams it will satisfy most weight weenies out there (no I'm not going to convert to oz because the favour is never returned—hint hint USA how about just this once joining the rest of the world and converting to metric—just this once—I promise you will not regret it. Honestly it's not a short jump from metric to the New World Order).
Construction & Durability: I haven't used it enough to really comment on durability. But treated with respect the tarp should stand up to much of what the weather has to throw at it. It might struggle if it has to cope with rough handling from the user though.
Conditions: You often read it's a 'three-season' tarp. And I can understand why manufacturers would say that (the USA wonderful tort laws make manufacturers leary of making sensible claims like 'yes you can use it in the midst of winter so long as you know what you are doing'.
And that's really the crux. Be sensible and learn the various pitch types that give you the options in inclement weather. It can be used in virtually any conditions short of hurricanes, tornadoes, 'The day after Tomorrow' freezes, tsunamis, and catastrophic climate change (trying to think if I've covered all bases here in case one of you actually tries to do something with this tarp that no sane person would do and then blame me for it).
Source: bought it new
Price Paid: $200 (metric dollars)
A non-free standing shelter by design that works well with a variety of conditions and platforms. It can be pitched with a pair of trekking poles or in between two trees. It's a versatile shelter that can be used as a ground shelter or even as a hammock tarp. Since this is a modular system, the weight can be easily be distributed between two people.
Best used for 3-season backpacking and can be used as a solo or 2-person shelter.
Pros
- Large tarp coverage (10 x 10)
- Lightweight at 2 lbs. 1 oz.
- Roomy for 1, easily a 2-person shelter
- Sturdy and wind resiliant
Cons
- Tricky to pitch
- Requires 8 stakes for tarp and 4 stakes for inner tent
- Challenging to pack tarp back in its stuff sack
Manufacturer Specs: http://www.seatosummit.com.au/products/bug-protection/escapist/
Scope of Testing:
Among all the shelters I have owned, this Sea to Summit Escapist became my favorite. Having experience with using tarps and tarp shelters, it was easy for me to utilize this type of shelter system.
For the Escapist Shelter System I tested this Escapist 15D Tarp with the Escapist Ultra-Mesh Bug Tent and Escapist Groundsheet. Sea to Summit also offers an Escapist Ultra-Mesh Bug Net for the system.
I do have to warn those that have no experience with tarp style shelters, you need loads of practice and patience when setting this up. With the various guyout points and the fact that the inner tent has to be setup separately, it can be quite a challenge.
I would honestly recommend this shelter for those who have experience with tarps, simple knots, and a proclivity with site selection.
Out of the Box:
I was quite excited when I received this shelter. I've always been a fan of the versatility of a tarp system. There are a multitude of use for this kind of backcountry shelter. With my style of backpacking, I found that the STS Escapist fit my need perfectly.
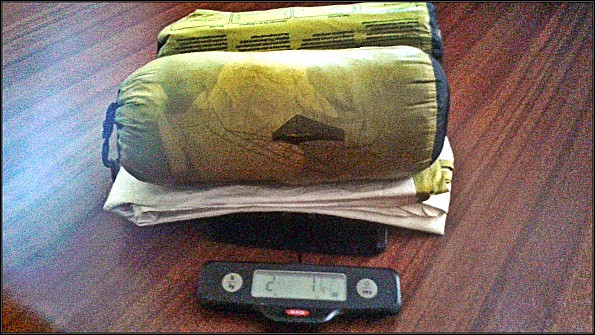
First things first, the weight. The tarp, inner tent, and groundsheet together weighed 2 lbs. 1 oz. I was a bit sad though that the shelter did not come with the 10 stakes you needed to pitch. Luckily I had a few of those on hand. I purposely did not include the weight of the stakes only because this was not included.
Out of the box, the fabric felt light and fragile. However, don't be fooled by this. The 15 Denier Silnylon used for both the tarp and inner tent is very strong and durable. In a pinch, I would use the tarp as a makeshift bivy without worrying about punctures to the fabric.
Setup:
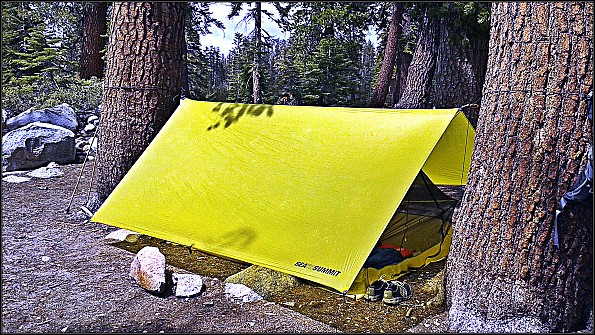
As I mentioned, this is a shelter system that requires practice and patience. Once you have that down, it's not as difficult as it looks to set this up. Personally, when I used this shelter, I opted to pitch in between two trees due to the ease of the setup.
Features:
Let's go over some of the features of this system.
Tarp:
- Made of 15D Sil/PU coated Ultrasil Nano Fabric
- 1,200mm waterhead rated Nylon
- 8 Stakeout/Guyout Points, all reinforced.
- Includes a pre-attached cord-adjuster on all points
- Ultra-Mesh Bug Tent made with the same fabric as the tarp
- Tubbed floor
- Single front door entry
- Fits two people
- Can be pitched on its own
- Attachment points to tarp
- Comes with cord-adjusters on each corner (4)
The inner tent paired with the 10 x 10 shelter can easily fit two people. Though, the single entry could cause you waking up your partner on those needed "middle of the night" calls.
Weather Resistance:
Rain:
As usual, living in Southern California, rain has been hard to come by this year. Though I have no doubt of it water resistance, I will need to update this review once I encounter some weather with this shelter system.
Wind:
Same with wind, the most I've encountered was maybe a 15 mph wind — still not a true test. However, that one evening with wind, my shelter barely budged. The guyout points held true for me.
Moisture/Condensation:
What condensation? With how this shelter is designed, condensation was never an issue during my use of this system. With how the air flows inside the system, whatever moisture there is is being dried off quick.
Final Thoughts:
The Sea To Summit Escapist Shelter is a well-made shelter system. I would recommend this shelter for backpackers looking to cut weight on their shelter and also recommend for those looking for versatility.
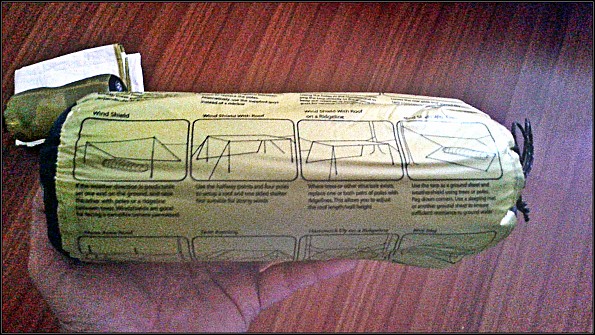
As mentioned, the tarp can be used as a hammock tarp or as a stand-along tarp shelter on those bug-free evenings at camp. The stuff sack even comes with instructions/diagrams on the many ways you can set this shelter up.
It can also be used as a group shelter looking for a quick escape on those Sierra surprise downpours (though on my time using this, not one drop).
One thing to note, this shelter is not for the inexperienced. Requiring 10 stakes total, it takes some practice and patience to set this up.
Additionally, the color option for the system is limited to the yellow color. For those looking to "blend in," this might not be the best option. Personally, I didn't mind it. I actually like the bright color, this helps me spot my shelter from far away.
Tester Background and Condition of Use:
I have been backpacking the past three years with trips ranging from simple overnights to multi-day trips in the Sierra Nevada Range, Death Valley, Mojave Desert, Angeles National Forest, Cucamonga Wilderness, Sespe Wilderness, and San Gorgonio Wilderness.
I tested this Escapist 15D Tarp with the Escapist Ultra-Mesh Bug Tent and Escapist Groundsheet. Sea to Summit also offers an Escapist Ultra-Mesh Bug Net for the system.
To date, I have used the Sea To Summit Escapist shelter on a multitude of trips from Yosemite and the Angeles National Forest. This was my go-to shelter during my summer backpacking trips. Having an array of shelter selections, I seemed to gravitate to the Sea To Summit Escapist, well, because it's actually fun to setup! I can't wait to use this shelter on more trips using various tarp pitches. Highly recommended in my opinion.
Source: received for testing via the Trailspace Review Corps
(Sample provided by Sea to Summit for testing and review)
Large lightweight tarp with a variety of pitching possibilities. As an (extra) roomy shelter against rain and sunshine, even if you don't really need it, it's fun to add it to a minimalist tent. No stakes included, but then you can choose from your own stock the ones that will be best for the circumstances. Do not try to put it back in its own stuff sack.
Pros
- Lightweight (although mine is 390 g instead of 350 g)
- Easy to pitch
- A variety of pitching possibilities
- Fun to have
Cons
- Its own stuff sack is too small
We (my daughter and me) bought this tarp before heading out on the Overland Track in Tasmania, because we were warned about the usually wet weather conditions. As a minimalist tent we had the Sea to Summit Specialist Shelter Duo with us.
We took the tarp to be able to leave wet gear outside the tent, but still sheltered from rain. We had heavy rain and very strong winds the first night and were thankful for the extra shelter. Although pitching is generally easy, the wind on the first day posed somewhat of a challenge.
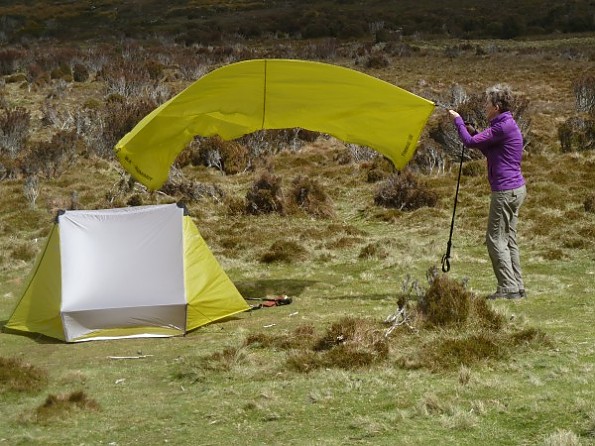
At night I got out to check the stakes once because the underground was quite soggy. I decided to tie the tarp to the tent, but that probably was not really necessary. It was good for my peace of mind, though. After that first night, the weather became really good, so we even got to use the tarp against the sun.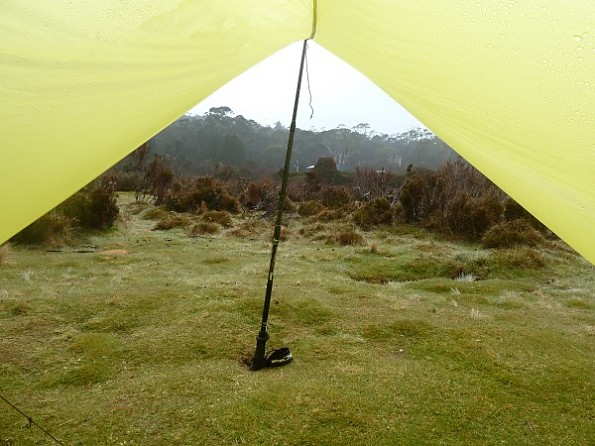
Combining tarp with Specialist Shelter
It takes some experimenting to make a combination that was not really meant to be. The first night I did not extend my walking sticks enough to leave room between the tent and the tarp. But the tarp touching the tent did not pose a problem. It's a pity that the tarp cannot easily make use of the poles of the tent, but then again: the combination was never meant to be.
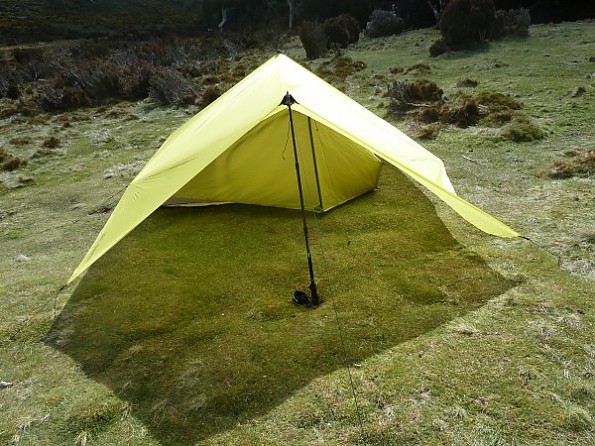
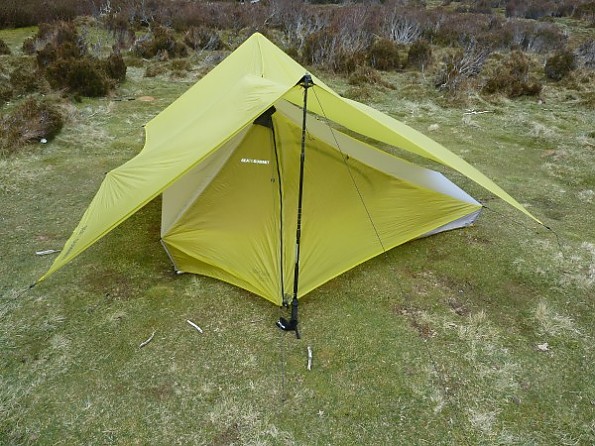
Because the tent does not have to be placed in the middle of the tarp like the Escapist Bug Tent, there is a lot of room left under the tarp. Pitching it against the sun is easy, especially when some trees are provided.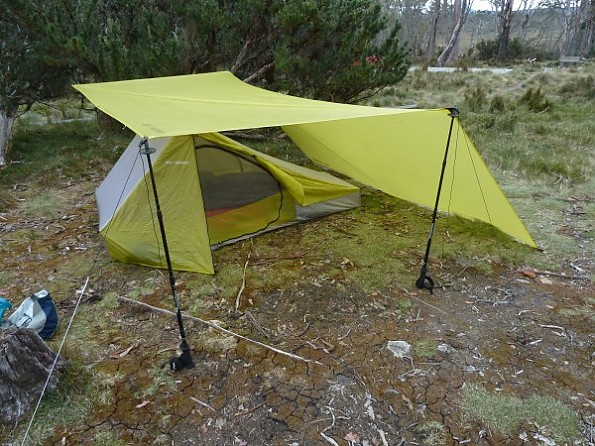
Stuff Sack
As soon as I got the tarp out of its stuff sack for the first time (still at home), I decided never to try to put it back in again. I use the stuff sack of the tent for the tarp and the tent groundsheet, and use another stuff sack that easily fits the tent.
Condensation
Although ventilation is great, depending on the weather the tarp may collect quite some condensation. We always bring a clean microfiber dishcloth to wipe tents if necessary in the morning. Works great combined with sun and/or wind.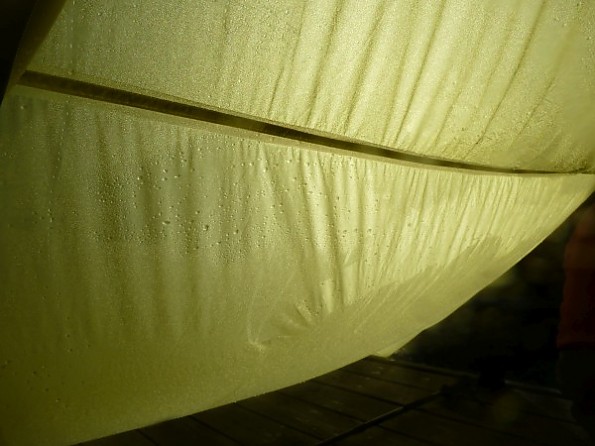
Source: bought it new
Price Paid: € 200
Your Review
Where to Buy
You May Like
Specs
| medium | large | ||
|---|---|---|---|
| Price |
MSRP: $199.95 Current Retail: $114.50-$249.99 Historic Range: $114.50-$249.99 |
||
| Dimensions | 8' 6" x 6' / 2 x 2.6 m | 10' x 10' / 3 x 3 m | |
| Shape | Rectangular | Square | |
| Weight | 10.5 oz / 300g | 15.5 oz / 440g | |


