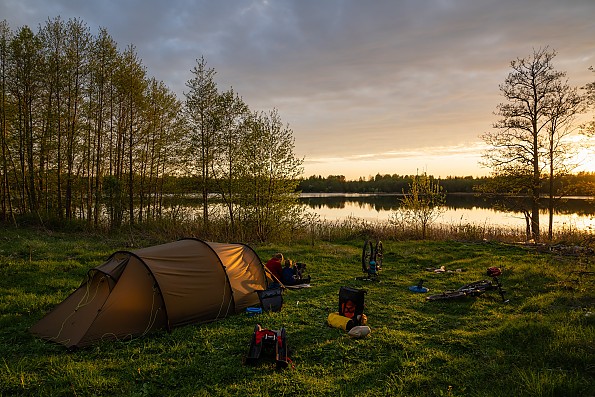
Hilleberg Kaitum 3
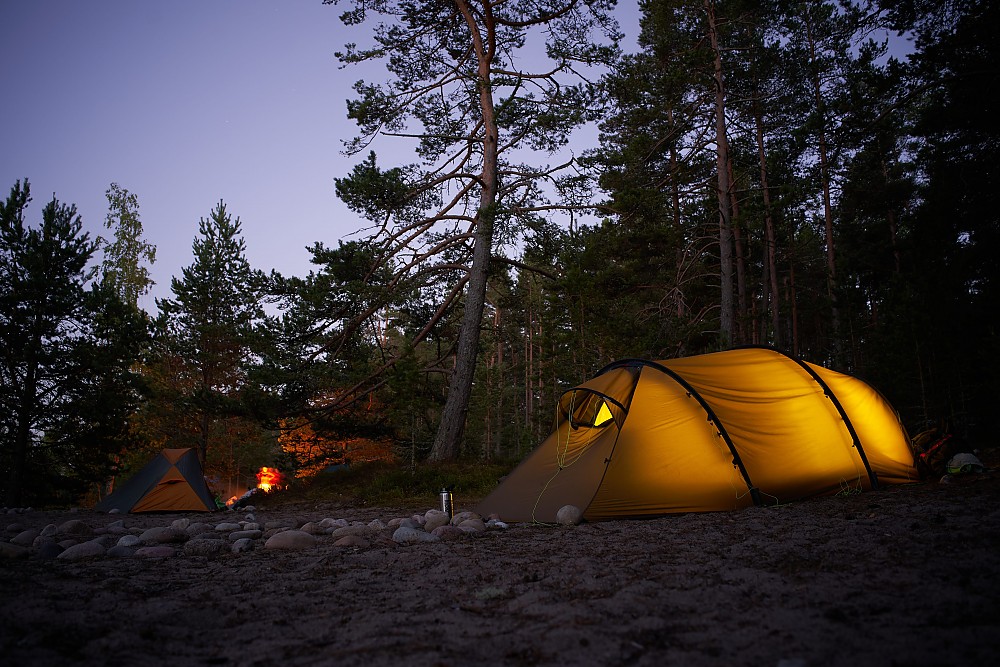
One of the most spacious, strong, and easy-to-pitch tents in this weight category. It equally fits for family trips as well as for severe weather conditions. It's not freestanding, and its price is high, but that barely bothers us, given the tent strengths. Absolutely the best buy for our particular usage scenario.
Pros
- Very large internal space, can accommodate 4 people in need
- Two large vestibules with enormous storage area
- Strong 4-season design and very versatile ventilation, good for both warm and cold weather
- Numerous setup options
- Very fast, easy, and “gloves-friendly” pitching for single person on most surfaces
- Most elements are well-thought
- Strong fabrics
- Lightweight for such size and strength
Cons
- Pitching on bare rock, snow and sand may be challenging
- Inner height is slightly lower than average (but still good)
- Huge packed size due to loose (and also a bit weak) tent bag
- The ceiling has some tendency to sag and collect water in rain
This is a long-term review of TWO Kaitum 3 tents, which I’ve owned since 2016
The ‘2016 green tent was purchased initially and served as a base for this review. The ‘2017 “sand” tent was delivered to me as a warranty replacement in late 2017, and by the time I’m writing this, it passed the 100-nights mark.
See my Hilleberg Kaitum 3 albums for TONS of photos: green and sand.
Background
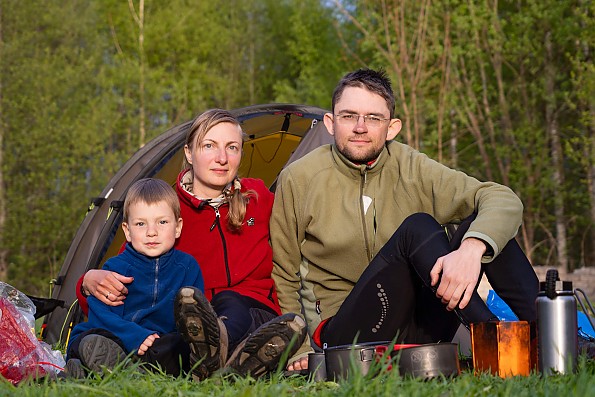 Our family of three enjoys year-round backcountry trips to various destinations (cycling in summer, hiking and sometimes skiing in winter). Actually we've never paid for hotel or similar accommodation so far, using only our tents.
In summer 2016, during the 15-day family trip to Finland with our Marmot Limelight 3P, I decided that we needed a new tent with outer pole design for easier pitching in bad weather while no one can assist me. It is important, because the main task of my wife during the pitching was holding our 1,5-year-old son (now he's 4.5, as I'm writing this) who usually tried to destroy the tent.
Also by that moment we’ve made three bicycle trips to Iceland using somewhat weak trekking tents, but our luck (regarding the weather) couldn’t last forever. For year-around trips we also needed a tent which combines warmth and good ventilation. Finally, the tent for family camping shall have large internal space (truly suitable for three persons) and two quite large vestibules (or a single very large one).
Unfortunately it was impossible to combine all necessary features in a single tent without raising the budget hugely. Given the target weight of 3 kg (7 lbs) in combination with outer pole 4-season design, only very expensive tents from Vaude, Tatonka, Fjallraven, and Hilleberg were suitable for our needs. As a rule of thumb, they have the best available fabrics and poles which save weight without a durability penalty.
Also at some point I had to abandon the freestanding design for further weight saving. It was a difficult decision, as sometimes we pitch our tents on rock, sand or snow, but on the other hand, we can always use our two bicycles as anchors.
Of all tents I examined only the Hilleberg Kaitum 3 offered a truly 3-person space (without corners being cut) in combination with relatively low weight of 3.4 kg / 7 lbs 8 oz, so the ultimate choice was quite straightforward. Also an interesting option could be Hilleberg Nallo 4 GT, but it’s heavier and has a sloped roof and only one vestibule.
Color
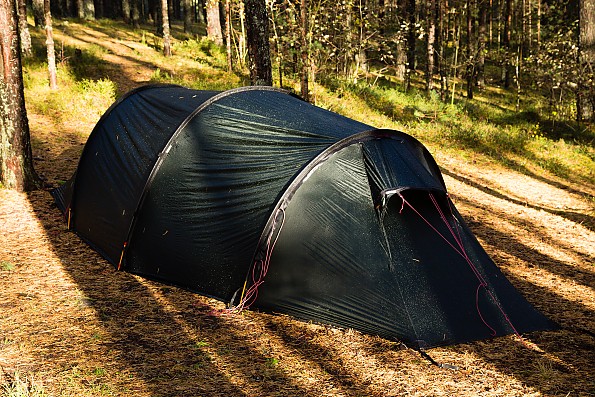
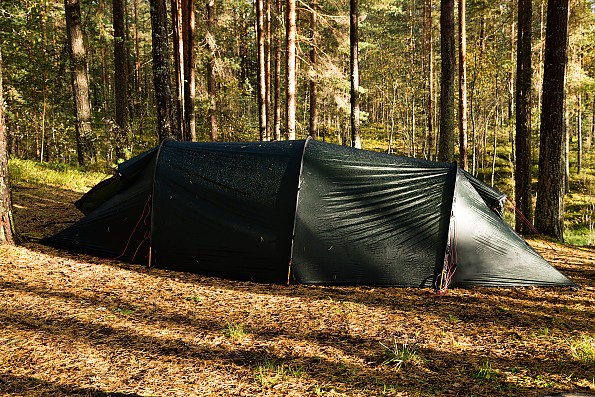
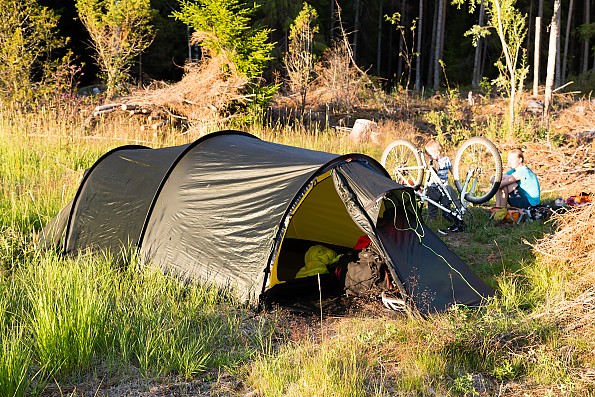
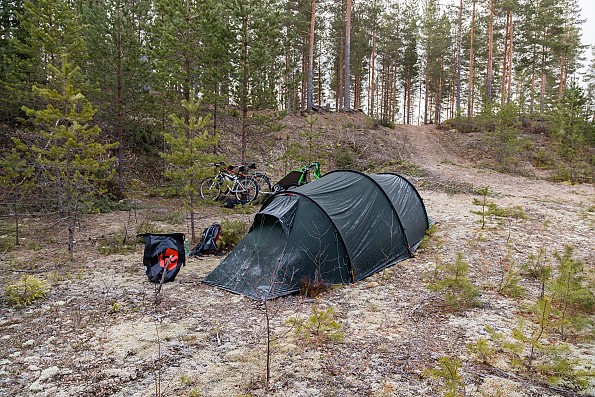
The first tent was green, because at that time it was the only one in stock, and I didn't want waiting for too long. In fact this is a very dark green, which looks almost black in most conditions. In darkness only the reflective patches may help you finding this tent in the forest.
So those of you who wants a happy-looking tent shall definitely choose sand (for hiding from others’ eyes) or red (for showing yourselves). Nevertheless, as the tent fabric is thin, there is no darkness inside the green one.
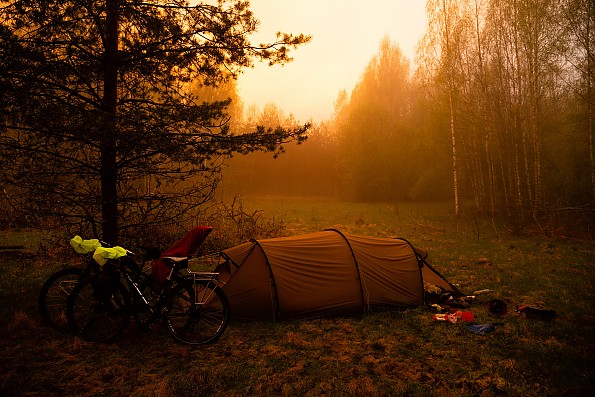
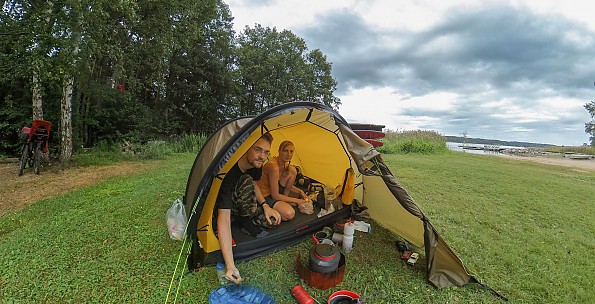
After getting the replacement tent, I liked the “sand” color a lot more. The fabric is easily penetrated by sun rays. In colder regions (like my home) that’s definitely an advantage, as we don’t benefit from lots of sun during the year. The stealth is even better — the tent readily blends with forest underlayer and basically everything.
I’d only recommend the green color if you need a dark tent for some reason.
Fabrics
I like the fabrics of this tent. The rainfly fabric thickness (30D) ensures optimum combination between weight and durability — the fabric is neither too delicate not too heavy. Thanks to very expensive two-sided silicone coating on the rainfly, the risk of accidental tearing the fabric is minimal. You can order the free Hilleberg Catalog, and try to tear the enclosed fabric samples. It will only stretch, not tear. Of course, you can still easily cut or pierce the rainfly fabric, so you’d better stay alert.
The floor fabric is approx. two times heavier (70D), and it looks durable enough for pitching everywhere except the sharp rocks and lava. There is some doubt about the footprint necessity, especially given its price and weight. Before, we'd used our soft bicycle bags for floor protection in our long-range trips. On the other hand, the floor in vestibules (which is added by attaching the footprint) is a great advantage in winter journeys. So I'd finally purchased one. See my review after 3 seasons of use of footprint.
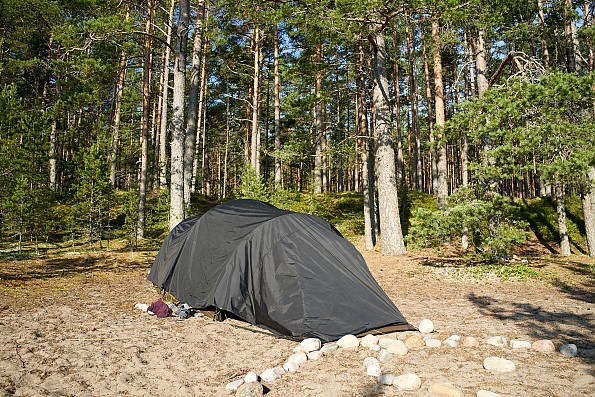 Covering the tent from the sun with footprint
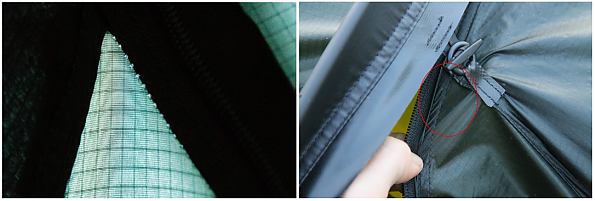
After a year of using the green tent I noticed the tiny holes in the rainfly fabric above the door, where the zipper is put under tension when the outer door is opened. There is a special toggle on the tent door for reducing the stress on fabric, but it doesn’t do so in some cases (when the zipper slider is left just below the toggle). So it’s better to avoid leaving the zipper slider in the area highlighted by red circle, as that causes the overloading of seam.
The Hilleberg’s view is that these holes are quite normal due to absence of seam taping, and I can simply apply the seam sealer (they can send it for free).
After about 60 nights the sand tent started dripping water into vestibule under especially severe rains, so I applied the seam sealant inside, and in subsequent thunderstorms it was completely watertight. The sealant may be readily provided by Hilleberg Support.
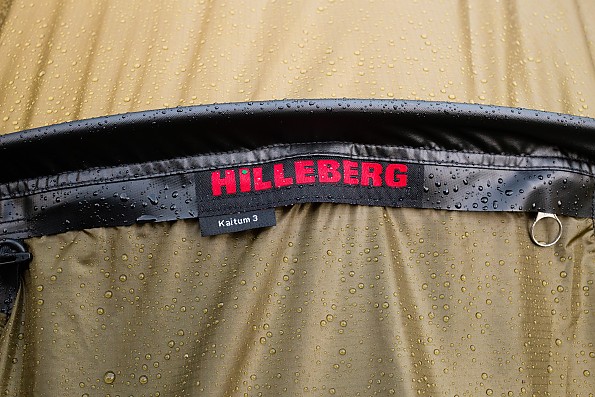
Also there’s some slight discoloration on the doors by 100 nights, but nothing special.
Packability
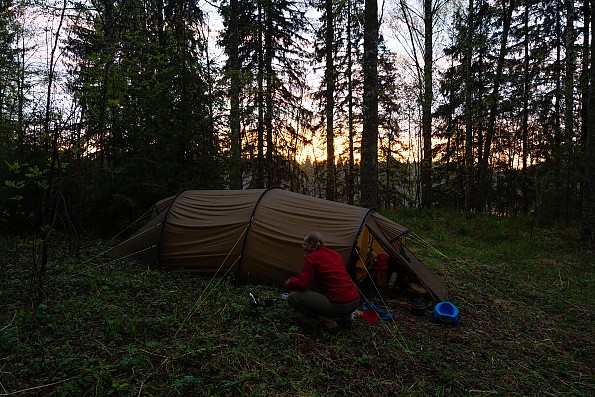
This is the complete tent which may be pitched in one minute or easily carried anywhere
The tent comes with a generously sized packing bag made from lightweight fabric (it doesn't match any fabric used in the tent itself). The bag is so huge (63×23 cm / 25×9 inches according to official website) that it may easily accommodate the frozen tent along with its footprint attached, and there remain lots of free volume. So you'll never have any problems while packing your tent in the bag.
On the other hand, the tent bag fits so loose, that the packed tent feels like hydration pack filled with water. Also the bag fabric is quite weak — after a single trip, the violent scratches appeared here and there on bag fabric. So you better be careful with the bag.
With super-compact Fjallraven Abisko Lite 3
The packed tent is not very long (shorter than our Marmot Limelight 3P by approx. 8 cm / 3 in) which may be important for bicyclers. My wife couldn't fit the Marmot into her bicycle pannier bag, but the Hilleberg's length is just right.
I've got a bit smaller bag (58×20 cm XP) for my second tent. It’s made of different fabric (heavier and more durable), and to my opinion such bag is much more suitable for this tent as it becomes slimmer, and also the XP bag is easier to carry. Its weight is 100 grams versus 50 grams (about 4 vs. 2 oz.) of stock (larger) bag.
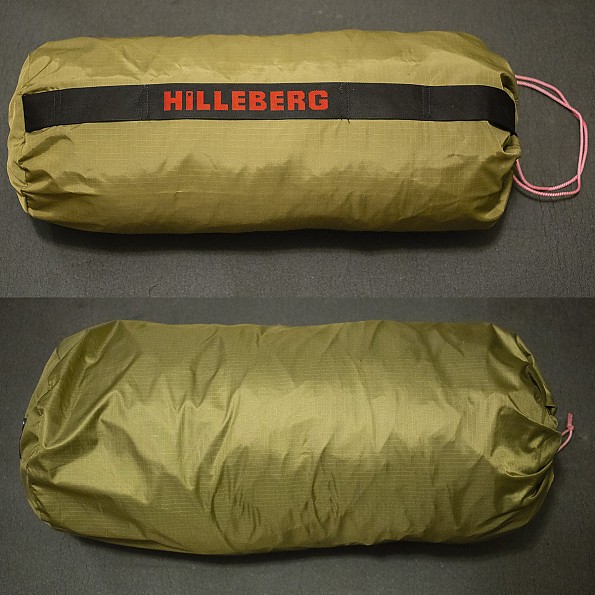 Stock and XP (a smaller version) bags
Setup
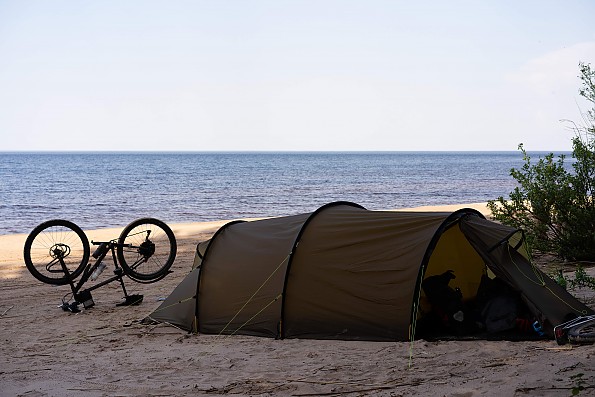 With right pegs pitching on sand is not a problem
In general, pitching this tent is very easy and quick for a single person, even in wind or rain. Thanks to outer pole design (the inner tent is hanging below the outer on numerous elastic loops), there is no chance of flooding the inner tent while pitching in the rain. You just need to find a 4.5×2 meter (14×6 ft) flat area free from obstacles and ideally with good soil for staking — it’s not so easy at times, but you wanted a large tent, remember?
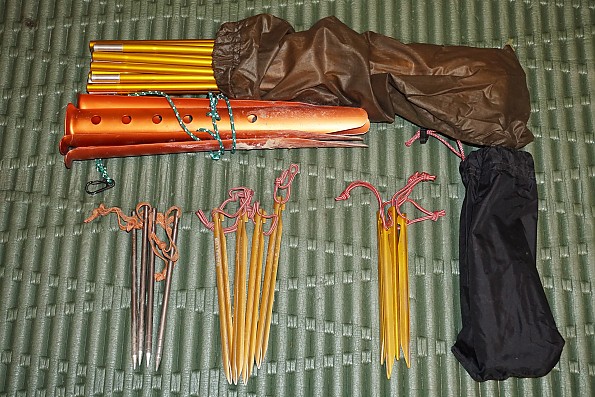
Due to tunnel design, on rock and snow surfaces (and on sand sometimes) the pitching will be more difficult and time-consuming in comparison to freestanding tents, so the special pegs are recommended, like titanium nails and the big ones for sand and snow (see photo below).
See my pitching video of this tent:
The pitching in heavy wind is quite easy even for one person wearing the gloves, the tent won’t make itself a sail and fly away. I really appreciate the “gloves-friendly” design, because I hate disassembling the traditional tents in winter without gloves (as the fine manipulations are needed).
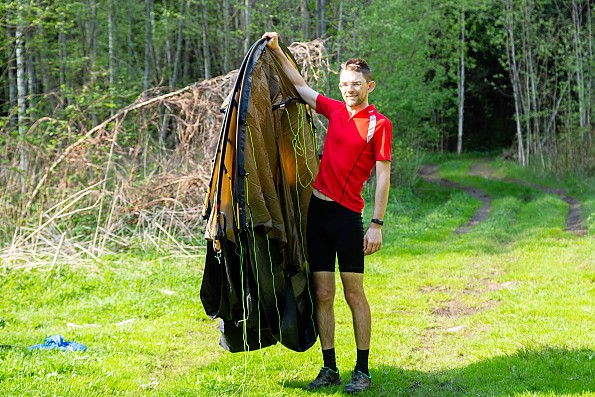
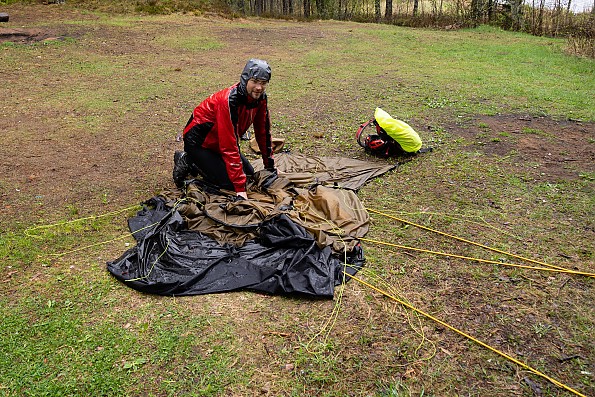 Packing the tent alone in terrible weather
In this case all operations may be performed in gloves:
-
Stake the windward end of the tent with 2 pegs.
-
Assemble the poles.
-
Slide the pole to appropriate sleeve all the way (the poles are symmetric and the longer middle pole is color-coded, so the chance of error is negligible).
-
Insert the free end of the pole to the holder cup and tighten the strap.
-
Repeat for all 3 poles.
-
Stake the leeward end of the tent with 2 pegs. Tighten the straps on all 4 pegs.
-
The tent is pitched basically. Add more pegs and guylines depending on conditions.
It’s very easy.
Note that inserting and removing the poles may be challenging for newcomers — it’s very useful to watch the official video instruction several times and carefully study the manual.
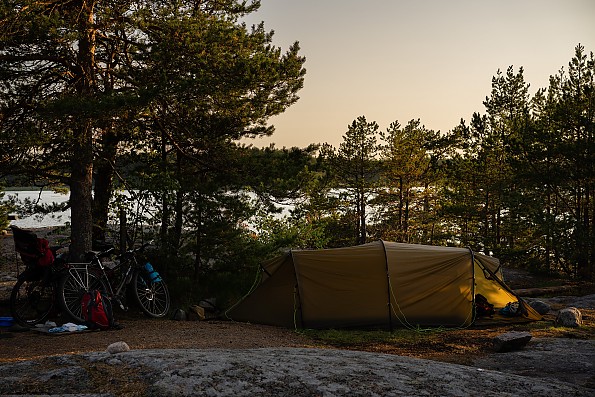 Pitching on bare rock is more challenging, but nothing special, if the're boulders or {better} bicycles nearby
While being not freestanding, the tent basically requires only 4 stakes for pitching. Also it may stand somehow even with just two stakes pitched diagonally. In general, I use about 10 of 18 included pegs. In good weather four pegs are more than enough — the properly tightened tent is pressed hard to the ground, so there is no desperate need of pegging everything without heavy wind.
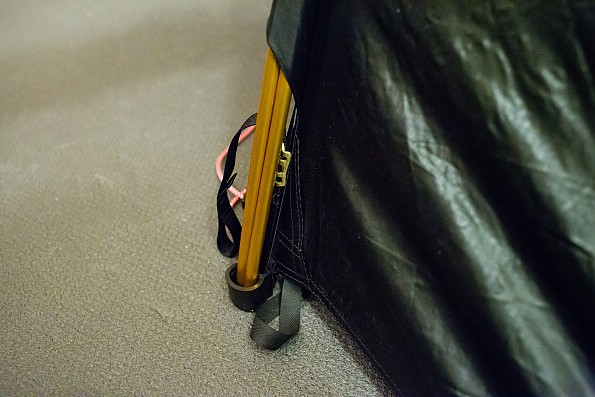 The tent may be pitched on optional double poles in extreme weather
Initially I was tightening the four main straps not very hard (but hard enough to my opinion). This caused the roof and walls to sag slightly, as seen on photos. The water was pooling on the top, and the walls could contact the inner tent. To avoid this I was using the guylines for tightening the rainfly. While adding tension to the outer tent, the guylines put the zippers on the inner doors under the stress (the inner tent entrance is stretched by the guylines via the elastic loops which hold the inner tent in place). This may reduce the lifespan of zippers.
After contacting the Hilleberg via Facebook I was told what I'm doing wrong:
-
The tent shall be completely tightened using the four main straps.
-
The guylines shall not be used for adding tension to the tent. They provide only support, not the tension.
-
I need to tighten the four main straps harder.
I tried this in my subsequent back-country trip — and it worked! After pulling the four main straps really hard the looseness disappeared, eliminating the need of additional tightening. The zippers worked fine.
But still the ceiling has some tendency to sag, especially on rainy nights, which leads to some water pooling on the top.
Stock Hilleberg V-pegs (J-stakes) on the right, plus additional Y-pegs (bigger), titanium nails, snow pegs and pole set
The pegs themselves are DAC J-stakes (reviewed by me) of very good quality, but they are a little bit small for such a large tent. Their hold may be not enough on sandy soil — for example, in pine tree forests or near the beaches. I've replaced the “main” 4 stakes to sturdier Y-pegs (like those used in the Black line of Hilleberg tents).
The tent setup options are numerous. Here they are:
-
A complete tent, pitched in a single piece.
-
With 1 or 2 vestibules folded (effectively removed). Ensures the best possible ventilation in hot weather. Remove one vestibule and store gear in another one.
-
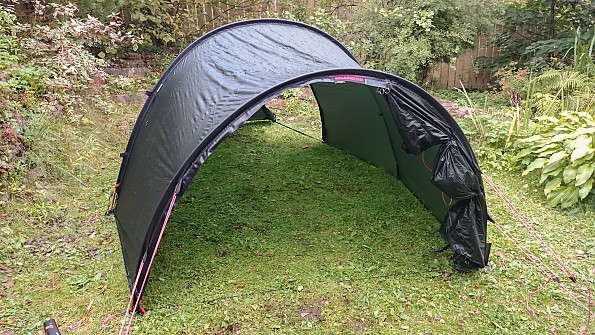
Outer tent only. Useful as a quick shelter which may be erected in few minutes. We were missing this feature in Iceland, where nothing could cover us from the wind and rain when we needed to stop for lunch.
-
Outer tent + footprint. Given the zero ground clearance and full footprint coverage, you get a gigantic (5-person at least) single-wall tent with about 95% protection against insects.
-
Inner tent only. The least useful option, as it requires 6 pole holders (purchased separately), it takes longer to build such a tent, and if you need to add a rainfly, you shall disassemble and reassemble the tent completely.
No traditional tent may offer you such a wide range of setup options.
For drying the tent after use at home (not doing so — the fastest way to ruin it) I separate the inner and outer parts from each other, turn the inner tent inside out to let the dirt and debris out (also there’s often more water inside than outside due to condensation), hang everything for drying and then reconnect both parts again. These operations take time, but thanks to the outer pole design, you can do it at home, not in the field.
In theory, the traditional tents may dry faster in the field when you unbuckle and fold half of the rainfly. It is not an option with outer pole design. Though so far I haven't got any problems with drying out the tent in my trips.
Dimensions and space
This tent is huge. It is even larger than one may imagine when looking at official schemes and photos.
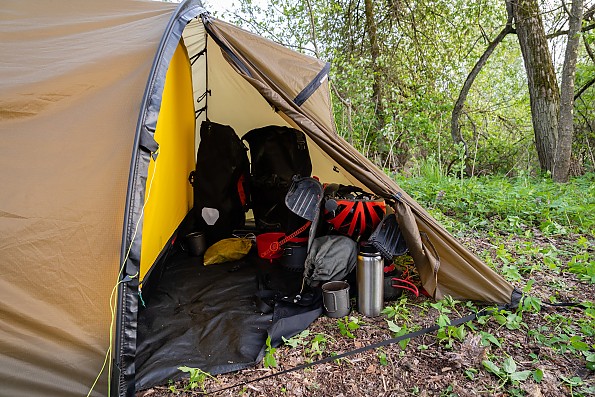
The vestibules are large as well — a single vestibule of such size easily accommodates the gear for three persons, and there remains enough space for entering and exiting the tent. I can sit freely inside the vestibule with all doors closed! Taking the 16-inch kids’ bike or bicycle seat into the vestibule is not a problem at all. Overall, the gear storage is simply enormous for 3 people.
The side vestibule door (lockable from inside) is an ingenious idea, which enables you to open the outer door from inside the tent and make your way outside without wiping all the condensate with your hair and jacket. Also the side door makes most of vestibule area available for gear storage (while the center door divides the storage area into two small parts). Unfortunately in our Nallo 3 tent the center vestibule door is less convenient.
The side wall of the vestibule serves as an entrance, note the kids' bicycle seat inside
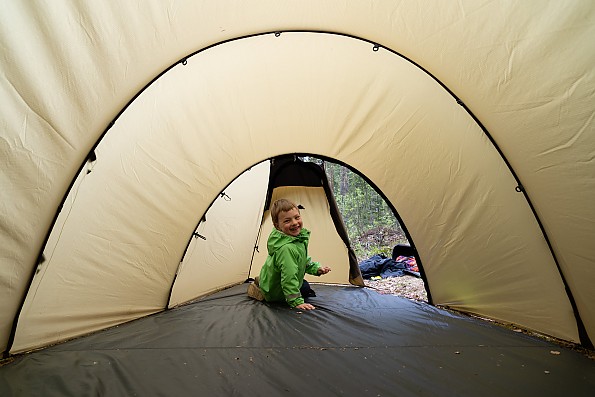
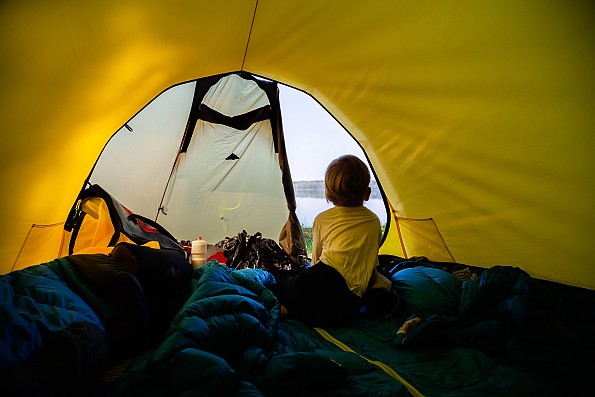
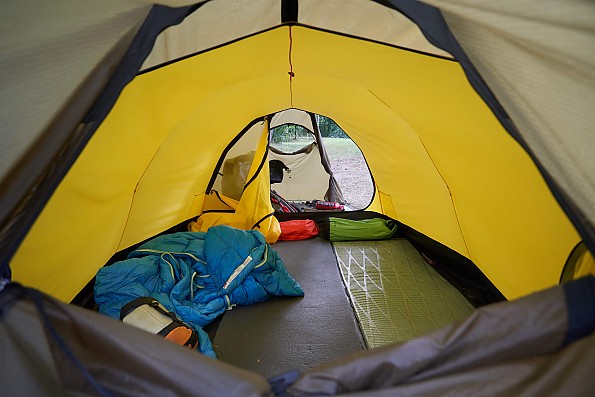
The inner tent is also much bigger than it appears in photos. Thanks to the vertical end walls (actually they have a slight reverse incline which helps avoiding the rain getting inside the tent) the inner tent looks VERY long from inside, like a hangar. Contrary, in dome tents the end walls are always sloped, this visually shortens the available space.
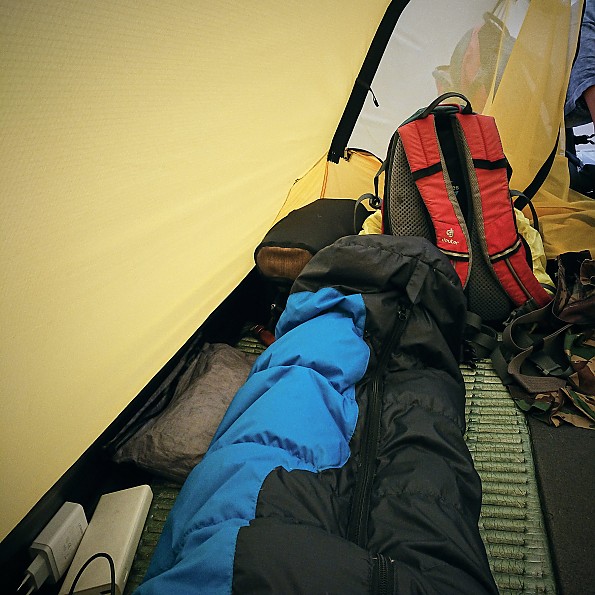 There's a plenty of space in the end, given my height of 184 cm
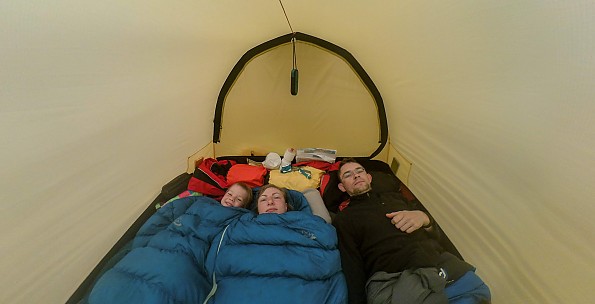
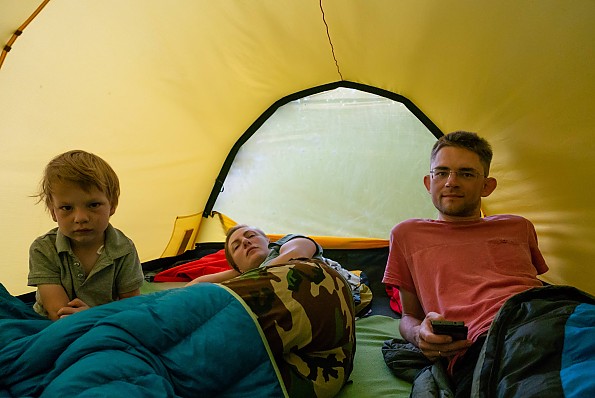
At inner tent length of 220 cm (86 in) there is a lot of space for placing the gear at both ends of the tent. Alternatively, there’s enough space to fit four [not very tall] people across the tent. For example, if using the Kaitum 3 as a double tent, and your friends get their tent broken during the storm, they will easily find a shelter in your tent for the rest of the trip.
The inner tent width of 155—185 cm (61—72 in) is adequate for a family of three — our 50-cm (20-inch) sleeping pads fit inside very loosely with lots of free space at the tent walls.
The only thing regarding the inner size which may not be liked by everyone is the tent height. Let’s face it — for better wind handling the Hilleberg tents are a little bit low to the ground. In my case the peak height is 105 cm (41 in) at the center, but at the entrances you've got just 89 cm (35 in). It is slightly lower than usual for 3-person general-purpose tents, but still a good value for 4-season tents. My place in the tent is at the wall, so I sometimes come in contact with the wall when sitting in the tent.
Nevertheless this tent is really large inside, and I couldn’t wish even more volume (like in Hilleberg Keron 3, which doesn’t have a sloped roof). Once we’ve got pinned down by a storm, and the three of us spent 30 hours in a row inside the tent — no problem at all.
Features
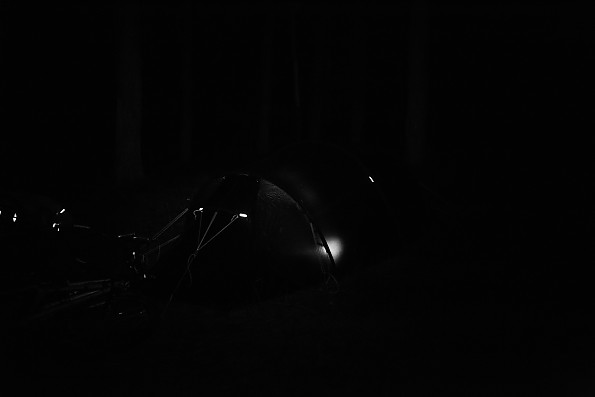 In the night only the reflective patches disclose your position (note the non-reflective guylines)
I was very impressed by all of those small parts of Hilleberg. Almost everything you can see or touch is designed with great care by people who were working on this tent in outdoors, not in the office. I like the ground straps which eliminate the need for side stakes for holding the shape of the tent. The ribbon holding the outer door from over-stretching is also very nice.
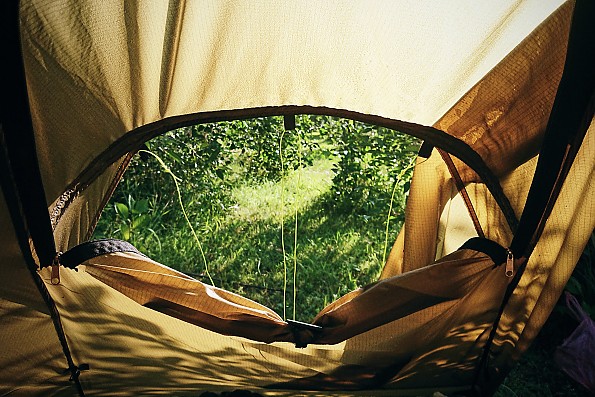 Even the ventilation hood guylines are designed is such a way that prevents the vent being blocked by a heavy nightly snowfall. The hoods themselves maintain their shape well even without the guylines because of copper wire frame. During the past years this wire didn’t cause any problems while packing the tent, and it serves its purpose well.
While the tent's minor features are performed on an excellent level, there is still some room for improvement. The zipper pulls are an older style metal ones, which makes them very loud during the operation and less convenient when using the gloves. Some people replace the zipper pulls by cord loops, but this will void the warranty on zippers. I’ve simply added the cord loops to existing zipper pulls.
The tiny toggles for securing the outer tent doors and outer vent covers look nice, but they are hard to operate with single hand. The Fjallraven company uses another method (piece of webbing with cord lock and loop), which is more convenient and easier to operate with one hand.
Drying our three down sleeping bags on the roof (there the short-lived Chinese green guylines)
I didn’t like the excessive thickness of stock guylines, I really need them in rare occasions, and they consume a lot of volume inside the bag. The guylines utilize about 25 meters (75 ft) of cord. So I replaced them to 1.25 mm bright yellow Z-Line Dyneema cord (reviewed by me). Stock CL260 Line-Lok Guy Runner (for 2-5 mm cord) required replacement to smaller CL266 Mini Line-Lok (for 1-2.5 mm cord) — also reviewed by me.
New guylines are well visible
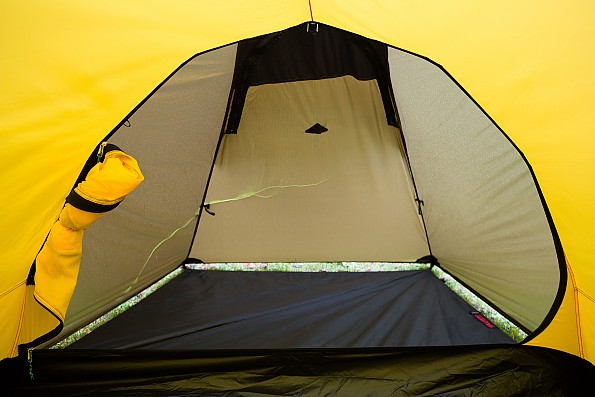
The inner storage options are very good. You get four large mesh pockets in the corners, but you better avoid putting any heavy or bulky objects (like stuffed tent doors) into these pockets, as the inner tent fabric is thin and it stretches under excess load.
In addition to 4 pockets you get a clothesline along the inner tent for hanging the lamp, glasses, gloves and so on. I would personally prefer a traditional gear loft (I don’t believe it’s truly possible to dry something completely on this line), but in tunnel tent there is little possibility to make a gear loft strong and durable enough. And the inner height is not large.
Ventilation
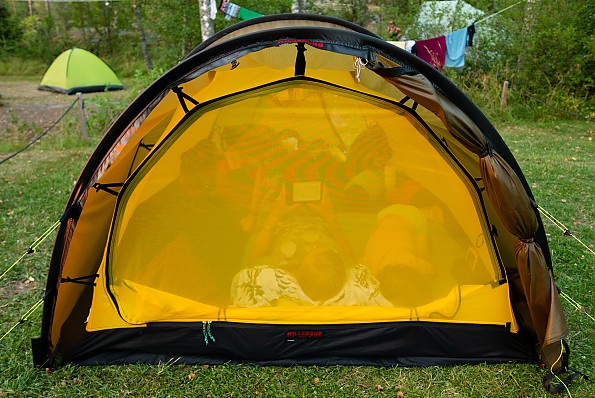
The ventilation is very versatile, which makes this tent a truly all-season one. Depending on conditions, you may shut completely or open, fully or partially, the enormous mesh panels on the doors (such panel covers about 90% of door area — 1 sq.m/10 sq.ft).
In summer days there is very good ventilation, thanks to huge inner tent volume and location of mesh panels — right above the heads of sleeping people. In mild weather we usually go to sleep with both vents opened by a third. At about 6 AM in sunny weather it becomes too warm inside, I wake up, open the vents completely and sleep for several more hours.
Two huge vents in the rainfly may be also opened wide to lessen the condensation or shut, and even in this case there remains some breathable fabric for the sake of safety. In really hot weather you move the gear to the rear vestibule and open or even fold the front vestibule completely (effectively removing it) for maximum airflow.
In cold and windy weather the zero ground clearance at the rainfly is a great advantage. But don't expect this tent to feel "warm" below freezing temperatures, its internal space is too huge for that. In unexpectedly cold nights we learned to unbuckle the 5 clips on one end of the inner tent, effectively reducing its volume and thereby increasing the warmth:
Warranty replacement
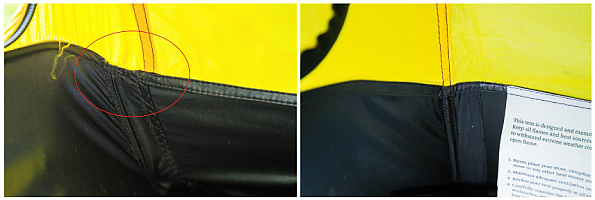
After a year of use, in our ‘2017 Åland Islands trip we discovered that our tent has a major factory defect. My wife noticed the loose threads in the inner tent, and then I suddenly remembered that one end of the inner tent was always tensioned in odd way. We found the stitching error in the bottom corner of inner tent. It caused extreme tension in small area between the inner zipper and the pocket. In return, that caused distortion of end wall and inner fabric damage (note the loose threads). Later this could lead to the major failure of inner tent.
The defective corner of inner tent and the opposite one
I’ve filed the warranty claim and sent the tent to Hilleberg headquarters in Frösön, Sweden. In two months I received the brand new tent in “sand” color (they did me a favor by changing the color, as I didn’t like the dark cast of green color). The entire tent got replaced, which was really nice from their side, as they could easily save about 600 EUR by replacing just the inner tent.
The replacement process took an unusually long time due to logistics problems with third-party companies, but I was offered a generous compensation in genuine accessories for this delay (in addition to getting the brand new tent instead of a used one). So after all I’m absolutely happy with my warranty experience with Hilleberg company.
Pricing and conclusion
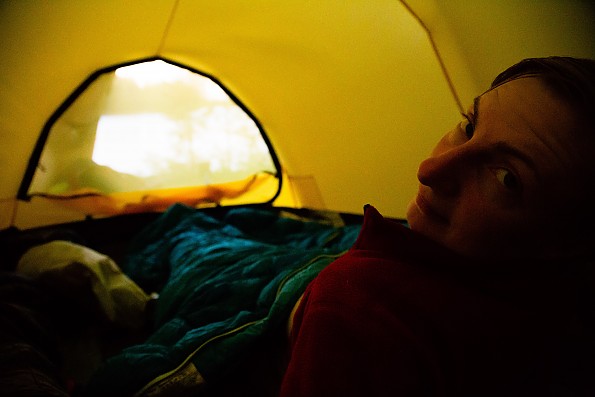 I think that the tent price is fair and it reflects its qualities — my wife concurs. Of course, it is well above the psychological barrier for most potential buyers. On the other hand, most of your money is invested into the best available fabric and poles which reduce the weight without compromising the strength and durability. The rest of the money goes to complicated and well-thought tent design which makes it strong and very easy to use.
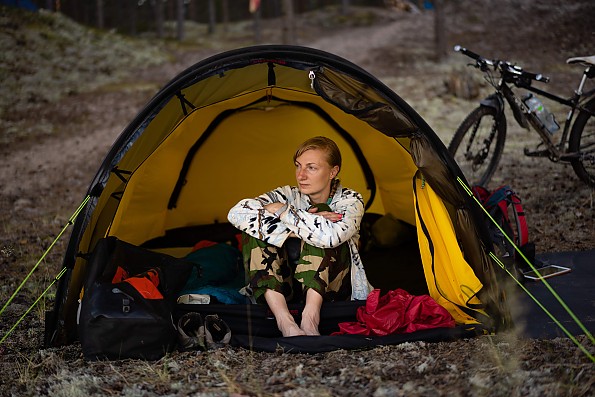
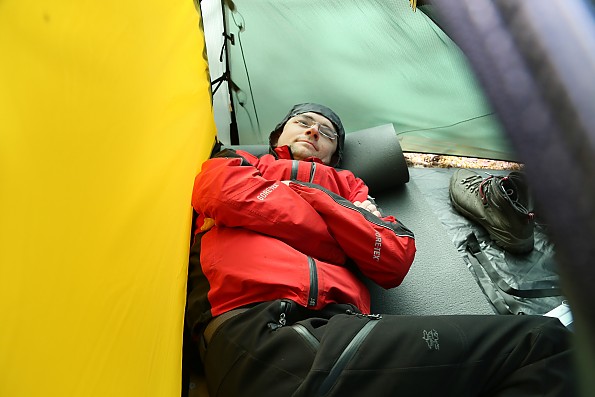
Resting in the fully closed vestibule with my legs comfortably pulled up
The hard truth: all top-value tents in this category are expensive, but you will get what you pay for. I would recommend this tent to anyone who needs a BIG tent for ALL weather conditions — from very warm to extreme. Note that the freestanding tent is really necessary only on bare rock and similar surfaces. On snow, sand and rocky ground you may simply use the special pegs (remember that EVERY tent must be anchored).
The Hilleberg company truly stands behind their products, you may be sure.
In the end of 2016 I purchased another Swedish 4-season tunnel tent: Fjallraven Abisko Lite 3 (see my review with detailed explanation of Hilleberg vs. Fjallraven differences). It is used in activities where the light weight is more important than internal volume, especially in winter trips, where huge tent volume is not welcome. It can also be used as a solo tent or in full-scale backcountry trips without our child. So our family activities are covered by a pair of 4-season tunnel tents.
In 2019 our Fjallraven tent was replaced to Hilleberg Nallo 3, and finally I feel 100% settled on this matter, as a couple of these tents (Nallo 3 and Kaitum 3) are as close as possible to ideal for our tasks.
* Bonus: Keron vs. Kaitum tents
I've spotted some owners of large Red label tents who weren't 100% happy with their choice, as they use them for family car camping. One must understand that Red label tents are designed as man-portable lightweight products with less emphasis on long-term durability and service life than that of Black label tents. The Hilleberg themselves specifically state that you need a Black label tent for heavy duty use (such as multi-month trips with prolonged exposure to UV, sand and abrasion). Also the Black label tents are always roomier than Red label counterparts.
On the other hand, the larger Black label tents are undoubtedly heavy and bulky for those carrying them on the back or on bicycle (unless there are 3+ adults to distribute the weight). I wouldn't choose the Black label tent (namely Keron 3 on Nammatj 3GT) for our cycling and backpacking trips.
But for car camping or similar motorized activities I'd recommend going Keron in place of Kaitum series, especially in the case of large models (3GT, 4, 4GT). The resulting price difference is not large, but the inner size and service life of Keron are more preferable for such a use case.
Background
About 30 nights (1 season) in green tent, 100 nights (2 seasons) in sand tent so far. Family cycling trips in varied weather conditions, down to -6°C (20 °F). It's one of 8 different tent models I ever owned personally, including those by MSR, Big Agnes, Marmot, Salewa and Fjallraven.
Source: bought it new
Price Paid: 860 EUR + 110 EUR footprint
This is one of the best all-season tents made that is suitable for backpacking or adventuring—top shelf materials and a superior design from an expedition tent manufacturer. This tent will handle some rough conditions, as well as a calm warm summer night. I advise combining it with the matching footprint.
Pros
- High area-to-weight ratio without sacrificing strength
- Easy high wind setup
- Great ventilation, or close it up for winter conditions
- Full sit up height anywhere in the tent
Cons
- Price
This is a full review, so hang in there, my friend. If you are interested in the Hilleberg Kaitum 3 tent, you may find my real world experience with it useful if you read this entire diatribe.
(NOTE: I'll be adding photos at the end of the review over the next month or so of some of the tent details. I've added a few already.)
As a 55-year-old cyclist, scouter, hiker, and backpacker, I’ve been through more tents in 40+ years than I can remember. I still have fond memories of that first nylon A type, 2-pole pup tent I used in scouting in the fall of 1971 at the tender age of 10. By my best estimate, I’ve owned at least 25+ tent of all types, sizes, and brands and I’ve borrowed probably twice that number to try out. I mention this only to give you, the reader, an idea of my experience level with tents.
I purchased the Kaitum 3 about 1.5 years ago to replace a 20+ year old heavy double wall tent that had been ruined a few years ago. When I started looking at tents to replace the old tent, my thoughts were I’d like a four-season tent again, but one that didn’t put 16+ lbs in my pack and isn’t super bulky. I’ve found that the Kaitum meets those requirements and much more.
I’ve now reasonably tested the Kaitum 3. In short, it’s the best “does it all” tent I’ve ever used or owned, if not the very best. That said, I’d like to point out that there is no such thing as the perfect tent that will work perfectly for every condition or situation, but this one comes as close as any tent I’ve used can come.
Below are the basic parameters I used when looking for this tent:
- Attention to design detail and material quality
- No need for additional seam seal / high seam quality
- Ability to handle very rough weather and high winds
- Setup in rough weather is simple and well thought out
- As high of a space-to-weight ratio for backpacking as I can get in a four-season tent
- Two-person minimum for my wife and me; potentially three-person for my two sons and me on occasion.
- Good headroom in a high percentage of the tent
- Good fitting custom footprint available
- True 4-season adaptability
- Adequate vestibule storage
Hilleberg “the Tentmaker” is best known for making high-end expedition tents of the very highest quality materials. Tents and shelters are all they make and they are still family owned. Hilleberg classifies its tents by “labels”; black for expedition 4-season grade; red for lightened 4-season grade; yellow for lightweight 3-season grade; blue for large base camp tent variations.
The Hilleberg Kaitum tent design is based upon the time tested Hilleberg Keron expedition tent, in a lightened version. They make two sizes of the Kaitum in standard and GT variations in three colors. It is a tunnel or “caterpillar” design, meaning its structure comes from a series of arched poles held parallel to each other by its outer tent fabric, giving the tent its classic caterpillar appearance. Such structures are very simple, yet very strong holding up very well under extremely windy and harsh conditions, making the design popular for expedition and adventuring use.
Hilleberg seems to have everything I look for in tents with nothing I don’t. With as many tents as I’ve had, I’ve become somewhat of a tent snob. I discovered Hilleberg a few years back when I saw a Keron setup on a bike tour. It seems the Kaitum has been designed for the backpacker that doesn’t want to forego tent stability and roominess while being weight conscious.
With Hilleberg, price point seems to be a minor concern when they design tents, including the Kaitum. The Kaitum is in its red label tent line, meaning some materials have been lightened from their black label expedition grade tents, but only enough to put it in the backpacking range of weight and not to the point of making it unduly delicate.
Hilleberg will send you samples of its tent materials if you request it. I can assure you, even their very lightest material is extremely strong and tear resistant compared to most other tent materials I owned, even though it is very thin and lightweight.
The poles are premium grade DAC aluminum and are swedged at joints and pre-bent, increasing their strength further. The tent “tunnel” shape insures this tent is aerodynamic, even when broadsided by the wind; it will not collapse inward when hit broadside. If you’ve ever sat in a tent in high wind with the wall smacking you in the head from the wind, you know what I mean.
The Kaitum has a very high number of guy points. Each of the six ropes on the sides are looped to two guy points each and the two end ropes are looped to three guy points each, making for 18 guy points with just eight ropes! All guy points are provided with ropes already attached with tensioners. All ropes have tensioners provided; not those cheap-o plastic figure-8 tensioners, but rather a high quality plastic line runner made specifically for the 3mm rope used by Hilleberg for this tent.
There are 10 stake down points on the tent body where it meets the ground for the highest wind conditions. (I normally don’t use the wall stake down points in fair weather.) There are enough stakes provided for all guy ropes and stake down points. Hilleberg guy ropes are woven to their core, much like larger climbing ropes, so it does not have a separate sheath that can fray from its core. Further, the rope is true static line, meaning it does not stretch.
The outer tent (which traditional three-season tent users would think of as a rain fly) is made of a non-breathable “Kerlon” material, in what they call 1200 weight; it is very supple and tough stuff and is completely silicone impregnated.
One thing you note when you look inside the inner tent is it is devoid of seam seal. Yikes, you say? No worries; it doesn’t leak due to a special process that Hilleberg uses to sew their tents. Mine has not leaked yet at 1.5 years old with probably 20 nights of nasty rainy weather conditions accumulated on it (60+ days of total use). The inner tent is made of more traditional rip-stop nylon and is breathable, as one would expect. Zippers, zipper covers, pole cups, and strap tensioners are all very high quality.
How many times have you had to wrestle a wet tent into its stuff sack? Even the Kaitum stuff sack is sized so that you don’t have to try to squeeze your tent into it. The sack is quite roomy, allowing the tent to be slipped in easily even when wet. Final compression of the tent occurs as you stuff the rest of the gear into your pack.
I can go on, but I think you get the point; The Kaitum is made of the best materials available and is engineered to the max, right down to the stuff sack. I see no signs of the slightest corner cutting in design or manufacture.
A tent’s ability to handle rough weather and wind has always been my paramount parameter when choosing a tent. Everything else is secondary. If I don’t feel confident a tent it can protect me when a pop-up storm comes up, it’s of no use to me. Hilleberg comes from a mountaineering/adventuring pedigree of tents and as such, its black label tents are designed to handle horrific conditions and its red label tents run a close second.
With all the guy points and materials used, the Kaitum handles some pretty tough weather. I have not been in it in more than a 40 MPH wind with driving rain, but at 40 MPH in rain heavy enough you have to almost yell to hear each other inside the tent, it is solid as a rock. Being that it is a four-season, no rain or mist blows up under the outer tent in 40 MPH wind as the outer tent goes down to the ground completely. You confidently can sit or sleep perfectly dry with no wind whistling through your tent in your Kaitum shelter.
Further, setting up in the wind is not difficult and the process is documented by Hilleberg on Youtube. Ever set up a self-supporting, free-standing dome type tent in a wind? If you have, you know it’s a real challenge and often next to impossible. All Hilleberg tents are designed to handle high wind setup. The inner tent of a Hilleberg stays perfectly dry during setup, even if raining, due to the inner and outer being attached to each other and going up simultaneously so the outer always covers the inner. That won’t happen with a typical 3-season tent, or most 4-season tents, that use a separate rain fly!
In multiple day super wet conditions, you may have your inner tent detached from the outer to insure it stays dry when packed. Since the outer tent sets up before inner tent (inner is supported by the outer and attached from the inside), you can store your inner tent in a separate dry bag and attached it from the inside of the outer tent as a last step to make sure your inner tent stays bone dry, even in the harshest conditions. Sweet! There are very few tents that are capable of this type of rough weather capability and setup, with most of them being Hilleberg tents.
Weight-to-space ratio (with structural stability) is always a big tradeoff for backpacking tents. I don’t mean just square feet of floor space, but also headroom and cubic feet internally. My wife and I want a bit more room in our tent now than we did when we were 30. I had first considered the Kaitum 2. Then I noticed that the weight penalty paid to go from a Kaitum 2 to a Kaitum 3 is just 11 oz. (with footprint, 14 oz.), so I opted for the extra room of the 3-man Kaitum.
Since we do use the footprint, we pay a 7 oz. penalty each, which I find perfectly acceptable for the incredible comfort afforded. It feels like being in a mansion on a trail. Others that have crawled in to check it out usually give me the “whoa!” once inside. With footprint, it weighs in at 8 lb, 14 oz. fully packed, so it’s certainly not an ultralight for a two-person outing, but it’s a great balance of “light enough”, strong structure and comfort.
The internal tent floor area is almost a perfect rectangle measuring right at 7’ x 6’, giving a lot of shoulder room for two people when sleeping. Further, the sitting headroom is 35” to 41” down the entire length of the floor, with a gently arched slope to the sides, making it possible for the average person sit up without hunching literally everywhere in the tent. This is one of the beauties of “caterpillar” design tents; they afford great cubic feet of internal area and headroom for their weight.
One argument against such tents is they are not free standing, which is true, but ‘tis a silly argument. But again, one has to consider high wind setup as well, for which free-standing tents are usually abysmal in. Not being free standing, but having this kind of living area, being able to handle high wind set up and overall conditions is a design trade-off I find more than acceptable.
Now if you are a person that hikes in calmer weather and on primarily rocky ground, perhaps the free standing parameter is more important to you, but I’d bet that this is not the majority of people using tents. The space-to-weight ratio of this tent is indeed superb.
I don’t use a tent without a footprint… period. Almost all tents today have custom footprints available, although the fit on some brands’ footprints is questionable. For a footprint to function correctly, it must fit perfectly. Tents are expensive and the bathtub floors of tents are key to keeping you dry at night. A footprint keeps the ground moisture down and keeps you from poking holes in your tent floor’s waterproofing. For this reason, I feel it is a key part of the tent system and should not be skipped to save a pound.
The Hilleberg footprints are unique. First, they don’t just lay under your tent or are held by the tent stakes. Rather, they are installed onto the tent before you ever head out and become a part of the tent. So when you set up your tent, there is no extra step to putting down the foot print, which means even in rainy weather set-up, no water gets on top of the footprint at all! The footprint simply comes along for the ride and is magically perfectly placed every single time. Awesome sauce!
The other unique thing is that the footprint doesn’t just cover the inner tent area, but the vestibule areas as well! This is very, very NICE. Not only does it keep ground moisture down from within the tent’s total area, it’s great to be able to slide out of the inner tent into the vestibule in cold/wet conditions and close up the inner tent before opening the outer tent, all while sitting on a dry surface to put your shoes on. I can’t say enough about that little nicety. I didn’t know I was missing that feature until I had it! Best footprint design EVER.
Why do I want a true 4-season tent? Because I can close it off 100% when I need to. Never does water splash up under the rain fly edges in high winds. What else makes a 4-season tent? I define a 4-season tent as being adaptable to ANY weather condition. From a hot summer campout, to blowing thunderstorms, to the awful time of year where it goes back and forth across the freezing point in the rain, to full on blowing and accumulating snow. If a tent can handle those four conditions and keep you reasonably comfortable in them all, then it’s worthy of calling itself a four-season tent.
Unfortunately, what many manufacturers are now calling 4-season tents are nothing more than a 1-season winter tent. I’m not going to pick on any manufacturer or design, but in my opinion most tent manufacturers have went in the wrong direction for the last 20 years on 4-season tents and ended up with 1-season tents. They usually suffer in the ventilation department.
Getting the right amount of ventilation in a 4-season tent in varying conditions is a careful exercise in opening doors and ventilation windows. If there are not enough of them, they are too small, or the convection flow isn’t right, then one cannot meet all the weather conditions and the tent turns into a wet sauna, gets ice forming inside or is just simply uncomfortable.
The ends of the Kaitum inner tents can be completely closed, left screened completely or any combination thereof. The outer tent vestibule ends can be rolled back nearly completely or left at varying levels of being open, plus there is hooded ventilation on each end of the outer tent for rainy/snowy conditions. I’ve been in the Keitum in 90+ F conditions down into single digits. The Kaitum design is truly a 4-season tent and handles those conditions with ease.
The Kaitum design has decent sized vestibules at both ends. Like most double vestibule tents I’ve owned, I end up using one vestibule (windward side) for storage and the other for minor storage and egress. As previously mentioned, the footprint covers the floor of both vestibules, making for nice sitting and storage areas indeed.
While I’ve not used the GT version of the tent, if one wants a REALLY nice big vestibule and true sitting area, the GT versions of the Kaitum design offers an extra outer tent section that increases one end of the vestibule by an entire tent section length. It adds about 1.5 lbs more weight and I don’t need the room for backpacking personally, but for other adventuring like bike or canoe camping, I’d opt for the extra vestibule space in a heartbeat.
Since you can remove the inner tent from the inside, it is possible to remove it and sit inside the tent on rough weather days when you are not going to pack out. This opens it up further inside making for a lot of usable room. You can then gather a couple more people inside more comfortably. Used this way, you can easily sit 4-5 people inside a Kaitum 3.
Hilleberg makes a point of this in their manuals and I have tried it out in my backyard, although I’ve never used the feature in practice while camping. I suppose on a cold windy day when base camping I might do so if I were with a small group, but I just haven’t had the opportunity yet. It is a unique feature to point out.
OK, so that’s all the good stuff. But like I said, nothing is perfect. Below are a few neutral and negative points. There aren’t many, but to be fair, I’ll point out the ones I’ve noticed.
Neutral Points
- Zippers: The zippers on the Kaitum seem somewhat delicate, but are holding up fine thus far, so it may just be perception. This is obviously to save weight, as zippers are one of the big weight contributors on tents. The one place where it could be problematic if you are not careful is on the inner tent. The inner tent is tensioned by guying the outer tent. If you guy it too tightly, you will put undue pressure on the inner tent’s zippers on the lower right corner area when you are facing the door from the inside. If you over tighten your guy points or don’t guide the door material back together properly, you can feel the zipper working hard and almost grinding on itself.
Some practice on guying the tent to the right tension and trying to use both hands when closing the inner tent zipper should be exercised. It doesn’t take long to figure out the proper tension and how to close the inner tent zipper as to not feel it “grind”. As long as you are aware, this isn’t a problem. For the amount I’m using the tent, it will be fine.
The other choice would be for Hilleberg to use the Keron’s heavier zippers on the Kaitum’s inner tent. I can’t say how much weight it would add, but it would add weight as it is a 6’+ long zipper X2. In their manual, Hilleberg makes a big deal about cleaning the tent zippers with a soft brush, especially when in sandy environments. I’ve not camped in sandy conditions with it, so I have not felt the need to clean them. I’ve not ever seen another brand of tent mention this. Because it’s a weight issue, I’ve put this point in the neutral category. I think as long as you are aware of this, it’s not a negative. - Specific rope compatible with their line runners: The ropes that Hilleberg uses is very nice stuff. However, if you cut one somehow or need to replace it, you can’t just use any rope and expect it to hold with the line runners, as it needs that weaved solid core to bite into well. It’s not a negative, but you should be aware. If I changed to another type of rope, I’d probably have to use an alpine adjustable loop instead of the Hilleberg line runners. But the ropes supplied seem very tough indeed, so I doubt I’ll ever replace them.
- Clothesline instead of attic: The Kaitum has four pockets in the lower corners of the tent. Because the inner tent is supported by the outer and the way it is help up, there is only an adjustable tension clothesline and not an “attic” in the inner tent. The line runs for one end to the other down the top of the center. It’s fine by me and not an issue. It’s a great way to dry your wet socks.
- Must be guyed to stand: To get it to stand requires just 4 stakes; 2 at each end of the vestibules. But like any tent, guy lines should always be put in place to insure stability if weather come in unexpectedly. As mentioned, the fact it is not a “free standing” tent is a neutral issue in my book. Being able to handle high wind set-up is much more important as is storm stability. Free standing really isn’t needed in 95% of the cases. I camped for 20 years before self supporting tents became the standard and had no problems back then, so it’s simply not important in my opinion.
- Colors: Comes in three colors, Green, Red, and Sand. I opted for green, but if I had it to do over, I’d get sand. The green is very, very dark and looks black at night, or at least mine does. In the morning, the tent stays dark inside fairly late, which I don’t like. But that was just my error in color choice.
Downsides — Nothing is perfect after all!
- Non-reflective guy rope: Hilleberg guy rope is super stuff strength-wise. But can’t they have it made with reflective properties? We’re already into some pretty rarified air price wise, so what would another $20-$30 be for it to have reflective properties added to the ropes? I like reflective guy rope so I don’t trip on it at night, but more importantly, other people from other tents tripping on my guy ropes. Some people just are not observant enough or give tents a wide enough berth, usually greenhorns. (It’s one of those “really?” moments when it happens.)
I’ve switched all my other tents out to reflective rope over time. Because I don’t want to sacrifice the holding ability of the line runners on the Hilleberg, but want light reflective quality to its ropes, I’ve resorted to pieces of reflective tape at strategic points on the Hilleberg ropes that end up being near the staking points. I’ve even asked them about this on the phone. There is no plan to make their ropes reflective. This isn’t a huge deal, but it is a negative in my book, albeit a small one and not related to the tent structure itself. - Inner screen door cover droops onto floor when opened, unless rolled perfectly: When I want the inner screens uncovered for maximum ventilation, I find it difficult to roll the inner door up and keep it rolled up properly to be held by retainers so that it doesn’t drag the tent floor or get caught in the door zipper when closing. Perhaps I haven’t taken the time to develop the proper rolling technique to keep it from catching, but it shouldn’t be this hard to do. It’s the one annoying wart in an otherwise nearly perfect design.
- High price: Hilleberg tents are expensive tents. Further, this class of tent NEVER goes on sale and the stores that carry them sell them for the same price as directly from Hilleberg US. With a footprint, this tent hits a proud $1,062. It took me four months to pull the trigger on it as that is a fair amount of money to be separated from for a tent. In the world of three-man four-season tents, that’s flying in the rarified air that only 1-2 other manufacturers soar to.
However, Hillebergs tents are in a class all by themselves in my opinion. Considering the balance of quality, design, area-to-weight ratio, weather performance, and overall flexibility, very little else compares regardless of price. If you can handle the price tag without hurting your budget too badly or crying yourself to sleep, you’ll not regret the purchase if you use the tent often.
If you are only going to spend two nights a year in it, it’s not worth the price. That said; I would NOT want Hilleberg to cheapen their tent materials or designs in any way just to hit a price point. Quality should not be sacrificed for a lower price.
The conclusion I’ve come to is that the Kaitum tent is a 5-star design. There isn’t much to compare it with. Are there tents out there for half the price that are really good? Of course, but they generally don’t achieve the mix of high specifications and design excellence that the Kaitum reaches. If you can manage the price, you’ll agree that the Kaitum is about as good as they come.
Photos of Details:
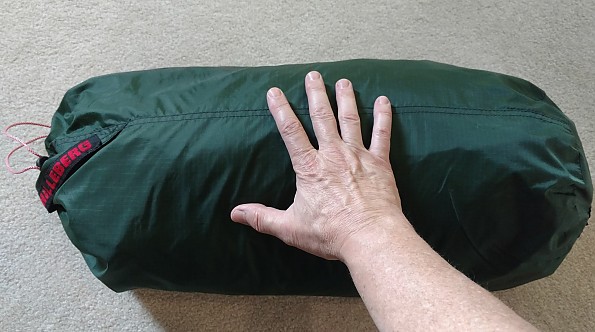
Very generously sized stuff sack. Not tight at all. Hand in photo for scale.
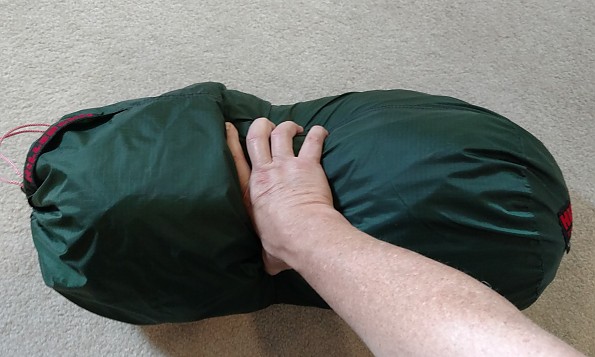
Adding slight squeezing with hand showing how much more it can be compressed.
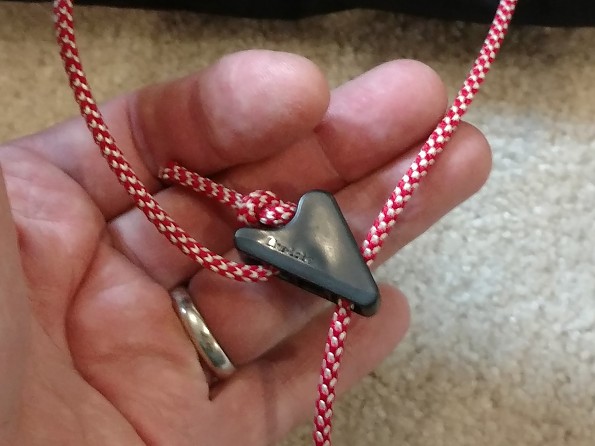
Here is the line runner used for tensioning the ropes. It is disengaged on the rope in this photo and the rope slides through a hole on the right side.
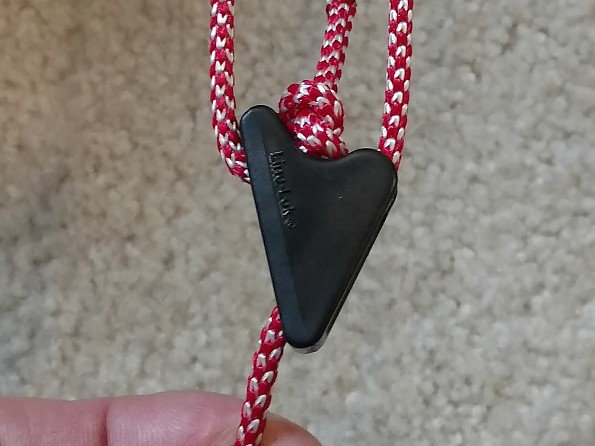
Here is a line runner engaged to hold the rope. The ropes can be tensioned and re-tensioned even with heavy gloves on with ease. I've never had one slip. Excellent design.
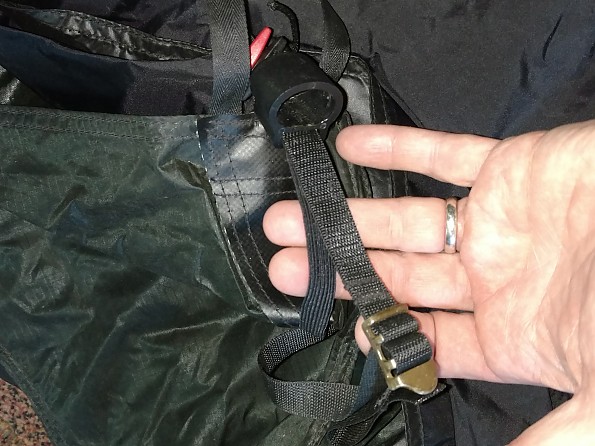
This is a pole cup and metal buckle pole tensioner. Note that the cup is oval, allowing one to add extra poles and double pole the tent for super stability in long term harsh environments. I can't imagine needing this, but if you want to minimize any rocking at all in gusty conditions in a base camp, this would be the ticket.
Source: bought it new
Price Paid: $930
I have the Kaitum 3 model but it's same as the 2 model apart from size and weight.
The Kaitum is a lighter version of Keron, for 3 people with that kind of space, it's perfect unless you always hike in storms. We used it during a week long trek in the Swedish mountains, and used the separate entrances for entry/exit and storing gear. This meant we had plenty of sleeping space and did not get in each others' way. The 3 person tent weighs 3kg, so for 1kg per person it's extremely roomy.
We try to go all the way with ultralight gear, using Gossamer Gear Mariposa Plus, Golite Breeze (eg Ray Jardine backpack) and Golite Jam. I carried the tent, clothes and sleeping gear and some of the shared food, and still came under 9kg in total weight. We did not carry any water though.
The tent is fairly bulky when it's packed, for one person to carry, but I packed the poles separately so I could compress the tent itself.
I also have the Nammatj 2 for storm style hiking, but it's almost unnecessary as the Kaitum 3 is way more roomy and only 200g heavier - so for a 3 person tent it can't be beat IMHO.
Design: 4 season tunnel design
Sleeps: 3
Ease of Setup: Extremely easy, 3 poles and outdoor luxury hotel style
Weight: 3kg
Price Paid: 500 uk pounds
Your Review
Where to Buy
You May Like
Specs
| Price |
MSRP: $1,290.00 Historic Range: $925.00-$1,260.00 Reviewers Paid: $930.00 |


